GridView
This example demonstrates how to populate GridView with data from the database using the ADO.NET way.
Before you proceed reading this example be sure that you know the basics of ADO.NET manipulation. If you are not familiar with ADO.NET then I would suggest you to refer at the following link below:
STEP 1: Setting up the Connection String
- Open your Web.config file and set up your connection string like below:
- Open your Web.config file and set up your connection string like below:
<connectionStrings>
    <add name="MyDBConnection" connectionString="Data Source=WPHVD185022-9O0;
                               Initial Catalog=Northwind;
                               Integrated Security=SSPI;"
                               providerName="System.Data.SqlClient"/>
</connectionStrings>
STEP 2: Create the GetConnectionString() method
- Create a method for accessing your connection string that was set up at the Web.config file
private string GetConnectionString(){
 return ConfigurationManager.ConnectionStrings["MyDBConnection"].ConnectionString;
}
Note: MyDBConnection is the name of the connectionstring that was set up in the webconfig.
STEP 3: Setting up the GridView in the mark up (ASPX)
- Grab a GridView from the Visual Studio ToolBox and then Set AutoGenerateColumns to False.
- Add BoundField Columns in GridView and set the DataField and the HeaderText accordingly. See below:
STEP 3: Setting up the GridView in the mark up (ASPX)
- Grab a GridView from the Visual Studio ToolBox and then Set AutoGenerateColumns to False.
- Add BoundField Columns in GridView and set the DataField and the HeaderText accordingly. See below:
<!DOCTYPE html PUBLIC "-//W3C//DTD XHTML 1.0 Transitional//EN"
             "http://www.w3.org/TR/xhtml1/DTD/xhtml1-transitional.dtd">


<html xmlns="http://www.w3.org/1999/xhtml">
<head runat="server">
    <title>Populating GrindView Control</title>
</head>
<body>
    <form id="form1" runat="server">
    <div>
        <asp:GridView ID="GridView1" runat="server" AutoGenerateColumns="false">
        <Columns>
            <asp:BoundField DataField="CompanyName"  HeaderText="Company"/>
            <asp:BoundField DataField="ContactName" HeaderText="Name"/>
            <asp:BoundField DataField="ContactTitle" HeaderText="Title"/>
            <asp:BoundField DataField="Address" HeaderText="Address"/>
        </Columns>
        </asp:GridView>
    </div>
    </form>
</body>
</html>
STEP 4: Create the BindGridView() method
- After setting up your GridView in the mark up then switch back to Code behind
- Declare the following NameSpace below so that we can use the SqlClient built-in libraries
using System.Data.SqlClient;
|
-Create the method for Binding the GridView
private void BindGridView()
{

        DataTable dt = new DataTable();
        SqlConnection connection = new SqlConnection(GetConnectionString());

        try
        {
          connection.Open();
          string sqlStatement = "SELECT * FROM Customers";
          SqlCommand sqlCmd = new SqlCommand(sqlStatement, connection);
          SqlDataAdapter sqlDa = new SqlDataAdapter(sqlCmd);
          sqlDa.Fill(dt);

              if (dt.Rows.Count > 0)
              {
                GridView1.DataSource = dt;
                GridView1.DataBind();
              }
        }
        catch (System.Data.SqlClient.SqlException ex)
        {
                string msg = "Fetch Error:";
                msg += ex.Message;
                throw new Exception(msg);
        }
        finally
        {
            connection.Close();
        }
}
STEP 5: Calling the BindGridView() method on initial load of the page.
protected void Page_Load(object sender, EventArgs e){
        if (!Page.IsPostBack){
            BindGridView();
        }
}
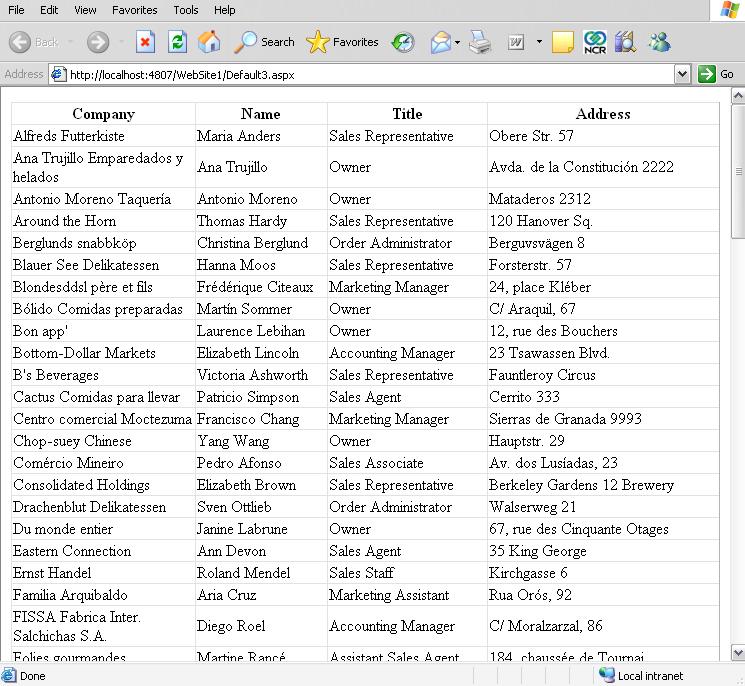
STEP 6: Displaying the Output in the page
- Compile and run your page to see the output.. see below
That simple!
No comments:
Post a Comment